
Saturday, 18 August 2012
Friday, 17 August 2012

Wednesday, 15 August 2012
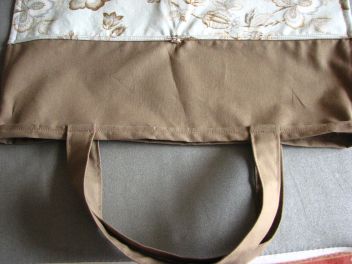
Fold-Up Purse Bags Finished
Well, almost - mine isn't finished yet - more on that later.


I used this tutorial for the idea. Her instructions are clear and easy to follow. I made some changes though to suit me.
1. All seams are encased here - no raw or serged or zig-zagged edges. They are all french seams.
2. I used corded elastic (like elastic string) as my elastic. There were pros and cons; pros it looks good and I was going for aesthetics here; cons it is thick and sort of hard to sew through.
3. I put a small bit of interfacing behind the button when I sewed it on for a little added strength.
Some process pictures:


Now, the reason my own bag isn't complete is that I have another project I need to work on tomorrow. I'm going to try to draft my own pattern for a bra - if it works I'll just tell you it did. If it doesn't work, then I need to go see my bra teacher for help and since I'll be back to work soon, this project takes precedent over everything else.


 |
| high heeled shoes |

I used this tutorial for the idea. Her instructions are clear and easy to follow. I made some changes though to suit me.
1. All seams are encased here - no raw or serged or zig-zagged edges. They are all french seams.
2. I used corded elastic (like elastic string) as my elastic. There were pros and cons; pros it looks good and I was going for aesthetics here; cons it is thick and sort of hard to sew through.
3. I put a small bit of interfacing behind the button when I sewed it on for a little added strength.
Some process pictures:


 |
| gap where I inserted corded elastic; back-stitched each side |

 |
| french seams pressed open before turning around and stitching again |
 |
| press, press everything |
 |
| cording inserted |

 |
| clipped corners during french seam construction |
 |
| How I pressed out the points at the bottom of the bag; this thing has a real name - maybe a point presser - it's used in dressmaking. I found this in the sewing room and it looks like my Grandpa or Dad made it for my Grandma. My mom doesn't sew so I've now claimed it for myself. |
 |
| more pressed seams |
 |
| handle insertion seam 1 |
 |
| handle insertion seam 2 - I turned the handles towards the top of the bag and backstitched over them |
Now, the reason my own bag isn't complete is that I have another project I need to work on tomorrow. I'm going to try to draft my own pattern for a bra - if it works I'll just tell you it did. If it doesn't work, then I need to go see my bra teacher for help and since I'll be back to work soon, this project takes precedent over everything else.
Tuesday, 14 August 2012
TTT Tuesday - Pinning for Points
Today I want to talk about how to pin to maintain your points. First, you need to cut and sew accurately with a scant 1/4" seam - I maybe should have done that first, oh well, next week.
Ideally, when two or more seams meet and you have to sew them together, you want your seams to nest - they snug into each other. You achieve this by pressing the same way - in this case, I've pressed towards the white on both pieces. When you snug up your seams make sure they are snug 1/4" into the seam allowance - that is where the thread will go. This picture has the pieces snug - so you can see what snug looks like - but out of alignment on top. Make sure your pieces line up everywhere before sewing.


How to Pin To Match Seams
Ideally, when two or more seams meet and you have to sew them together, you want your seams to nest - they snug into each other. You achieve this by pressing the same way - in this case, I've pressed towards the white on both pieces. When you snug up your seams make sure they are snug 1/4" into the seam allowance - that is where the thread will go. This picture has the pieces snug - so you can see what snug looks like - but out of alignment on top. Make sure your pieces line up everywhere before sewing.
Here's where the pin goes. Notice that I've made sure everything aligns 1/4" below my edge (where my thumb nail is) - that's where the seam will go.

Pinning to Keep Your Points
Here is the middle intersection of the stars for the Hunter's Star block. This is 1/2 the star:

The arrow tip is where the centre of the star is - where all 8 points will meet. All my piecing has been accurate up to this point and I want to keep it this way.
1. Insert your pin right into the point where all the seams meet - at the tip of the arrow. Only worry about this half of the star for now.

2. Flip over this half of the star, to the right side, to make sure the pin is still exactly in the centre of the star. If it isn't in the correct place, take out the pin and try again.

3. Now, put the pin through the right side of the other half of the star. And push it through to the wrong side.

4. Your pin MUST be at right angles to your fabric and straight. Pinch the fabric from both sides and use your finger/thumb to hold the pin straight. Imagine my pin is the yellow arrow below. Sometimes you have to wiggle a little to get your pin perfectly perpendicular.

5. Pin on either side of your point (with the perpendicular pin still in). Insert the new pins without distorting the aligning your did with the middle pin. My middle/point pin is yellow, the side pins are blue.

6. Now, take your your point pin.
7. When you sew, you want to go directly into the spot where the points are aligning - where your point pin originally was. My needle is going exactly into the centre point. If your fabric is really thick, like mine, go SLOW so that your fabric stays aligned and you don't bend your pins (like I did). I had to take the pins out as I went through the centre of the star cause it was too thick to sew otherwise. I would take a stitch or two, take out a pin, another stitch or two, take out the other pin, carry on.

8. Press carefully. In this case I set my seams first, then split them open with my fingernail, ran my fingernail along the split stitches, then presses from the wrong and right sides. With this may layers of fabric I pressed these seams open - they will lay much flatter.


9. Practice, practice, practice.
And look how beautiful these points are.
 |
| Front |
 |
| Back |
Please leave a comment if you have questions. Next week I'll do cutting accuracy.
Monday, 13 August 2012
Design Floor Monday
Here's my Hunter's Star half completed. I'm re-posting it cause I want to link up to Design Wall Monday.


Go over to Patchwork Times to see what everyone is up to.
Saturday, 11 August 2012
Fold-Up Purse Bag


Hunter's Star - Half Pieced
My Hunter's Star is half pieced. I'm always amazed at how fast it goes together once the blocks are all sewn. This will be big! There are 3 seams left to sew on this half but I'm holding off on those because I can store it better in 3 pieces.

I need to do all the cutting again for the other half of this quilt.
I'm taking a quick break from this quilt and sewing up some small things. Stay tuned...

I need to do all the cutting again for the other half of this quilt.
I'm taking a quick break from this quilt and sewing up some small things. Stay tuned...
Subscribe to:
Posts (Atom)