Today I'm going to talk about squaring up your fabric before you start cutting. If your fabric is squared on the grain of the fabric, your quilt will lay flatter and you'll have fewer distortions.
Notes of caution: I always pre-wash my fabric before cutting or sewing (unless I use pre-cuts like jelly rolls or charm packs; which I've yet to use anyway) to avoid accidents like colour bleed or shrinking. I always buy a little more fabric than I need to allow for squaring up - I have seen cheap fabric go off grain by up to 10cm. With printed fabric, especially something with stripes or plaids, you sometimes lose your stripe or plaid if you square your fabric to the grain - then it's your choice about whether to square the fabric or cut to the printed pattern. I seldom buy stripes or plaids for that reason, but if I do have them, I use them sparingly and not in the borders unless I'm sure they're on straight of grain (I had this problem with some of my Dear Jane fabrics and for them I cut to the printed pattern to maintain the plaids as much as possible). If you rip your fabric to get a straight edge - it doesn't always leave you on the straight of grain so be careful. I ripped the red to get a manageable size and it's off - as you see in the photos. The white I'm using I also ripped and it's not off grain as much as the red. I find the cheaper the fabric, the more it rips crookedly.
Step 1: Wash and press your fabric if that's your plan. Then, match up the selvages (the finished ends, not the ones you cut) of your fabric. I hold my hands about 1/2 yard apart and grip the fabric like this:
Thumb towards me, then the front layer of fabric, then pointy finger, then back layer of fabric, then middle finger.
You match up the edges of the fabric, not the corners.
2. Wiggle and manoeuvre your fingers until your fabric hangs straight down with no ridges or bumps:
 |
| This one is good, no ridges or bumps running on the diagonal and the folded edge on the bottom is even. |
 |
| This one is even worse - see the ridge above the arrow? See how the folded edge is uneven on the left side? |
3. Once you get rid of your ridges, carefully lay your fabric on your cutting surface.
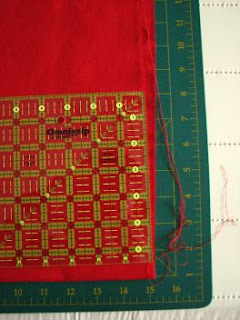
4. Now you need to trim the fabric to get a straight line. Use a long ruler and lay it straightly and evenly along the FOLDED edge of your fabric. I will cut on the right side of the ruler - I need the 6" of ruler to lay along the fold to help me be straight.
5. Move the ruler left or right until you can get a straight line through all your layers.
 |
| At the selvage edge I'm off by close to an inch. The ruler is along the edge of the top layer of fabric to help you see. |
 |
| This is how much I'm off at the folded edge - not too much |
 |
| The fold is towards me (at the bottom) and I'll cut along the right hand side of the ruler. |
These are all the photos I took so this must be the end of the tutorial. This tutorial also talks about cutting accurately.
Happy sewing!


