Thursday, 4 June 2015

More Templates For Machine Quilting

I really got into the dot-to-dot method of quilting for my sister's quilt. In the big white shapes I needed to put something. My first idea didn't work too well, then I came up with this:
Sorry it's a bit hard to see - I guess my thread blends really well.

This is my template

 And my resulting dots


Then I quilted it. I'm pretty happy with these results and there is so little marking to remove.

Tuesday, 2 June 2015

Remember to Blink

I took a quick break from my sister's wedding quilt (here, here, and here) this weekend to whip up a quilt for a baby shower. The parents-to-be are the brother and sister in law of my sister in law. I see them a lot at family gatherings and this is their first child - a cousin for my nieces.

I made them this quilt

Which is a pattern I borrowed from Buttons Quilts and it was super easy.
I quilted all straight lines, with the walking foot, doing stitch in the ditch down and across the sashing, then horizontal and vertical to match all the small squares - I ended up with a big grid of about 4" squares, interspersed with some 2" lines/squares. It looked good. If you look hard you can see the lines in the orange square.


I marked the lines using my hera marker - it just makes an imprint line in the fabric which I don't have to remove later - a total bonus given my tight timelines these days. It was pretty easy to see - it was an overcast day and that might have helped.

When I was quilting along the sashing, like here
and here
I had to keep reminding myself to blink - blinking helped keep me accurate I think. The pattern on the fabric is busy and almost mesmerizing too.

The label:

My nieces coloured the fronts of these cushions on our last crafternoon so that they would have something to give their new cousin. The backs of the pillows matches the back of the quilt.


The soon-to-be mommy loved them.


Monday, 1 June 2015

Quilting Update

My sister's quilt is coming along pretty well.
I'm either going to be just finished or just not finished by the time I have to leave for the wedding. No big deal if it isn't finished (But I'd like it to be so I can have the space back in my sewing room and make something for myself next).


Tuesday, 26 May 2015

Improving My Quilting

I've been on sabbatical since Feb 1 and have been sewing a lot - but not doing too much quilting.

Until now.

I've been working on a wedding quilt for my sister and it is a beast of a thing in terms of size and weight and I was struggling a bit with the quilting. Then I saw that Craftsy had a big sale on this past weekend so I picked up two of Angela Walters classes: Dot to Dot quilting and How Do I Quilt This?

I started with the Dot to Dot class because it was pretty short and I realized I don't want to be doing too much marking on this quilt.

Today I finished the stitch in the ditch on the quilt and started with the free motion designs. I followed some of Angela's ideas and incorporated a few of my own.

I decided on a simple design and made myself a template to help with the dot placement. I do like things even and well spaced.

My squares are about 4 1/2" wide so I started with a square that big and I marked off the diagonal lines:
sorry for the bad lighting - I had the drapes pulled to try to keep it cool in the house - we're in a bit of a heat wave right now
 The little ticky marks are about half way between the centre and the corner and 1/2" out from the centre line.

Then I cut it out and notched the ends and ticky marks. The ends I notched out to help with placement and centering. It worked great.

This is the first square I marked. See the 8 little blue dots? My other "dots" for quilting are the corners and the centre - I didn't mark those.

Then I did my first shape. It looks pretty good to me. I used a water soluble marking pen so a quick spritz with water and I was moving on.

On my next one I realized it was hard to hit the "dots" that weren't marked because they were a little hard to see (since they didn't really exist). So I added a few more marks - actual dots in all the places I need. I'm so happy with the results and I'm sewing right along.

Now, if my cat would only stay off the quilt while I'm quilting, I wouldn't have to drag her weight around with the quilt.

Monday, 25 May 2015

Quilting Update

I've been quilting away on my sister's quilt and it's going pretty well. The quilt is heavy so sometimes difficult to get under the needle of my small domestic machine - I'm managing and taking frequent breaks.
The quilt top seems really "loose" on the quilt and I think that's because I used safety pins to baste rather than spray and the quilt has been handled a lot to manage the sheer size and weight. It's also stitched in the ditch which I think is making it look a little wrinkly. When I'm finished quilting I'll give it a good starch and press and hope for the best.
My machine is starting to act up so I'm really hoping it will hold out until I'm finished - then it will need a good service.
The front and back to date:


and I think I figured out my border problem - when I remeasured today I was smaller than when I originally measured.

Thursday, 21 May 2015

The Problem With Borders

On my last post I showed you the progress on my Metro Rings quilt. Everything went great until I put on the borders - it was great then too, until I tried to baste it for quilting.


See those ripples in the border - not good! Not supposed to be there! I don't know what happened - I measured the quilt and the borders and sewed them on - everything I was supposed to do to get flat borders. (And if you think you know what the problem might be, please let me know. I sewed the borders on with a 1/4 foot instead of a walking foot - but that shouldn't have made it this bad. I'm wondering if I measured incorrectly somewhere.)

I was not happy. And I was pin basting it in a church, when the senior group was meeting, so no foul language allowed. I texted my quilty friends right away - they were consoling, offered some suggestions, and wished me luck. I googled to see what others suggested - to no great help though.

I emailed the quilting guru who thinks it's weird and I asked another expert. The consensus is to remove the borders, quilt the middle part, then put the borders back on. So, that's what I'm doing. And hoping for the best.


I only removed 3 borders for now. I pin basted the quilt - a first for me (and it went pretty well) and I sprayed one border to see if I could coax it to lay flat. No such luck. So I left the sprayed border on to avoid dealing with the stickiness of the spray. I'll take it off later.

I started quilting tonight. This quilt is a beast. The finished size will be 86" x 86" and right now it's about 96" x 96". My sewing machine isn't that big. It's a bit of a struggle to maneuver this thing under my needle - and I started in the middle to keep the wrinkles to a minimum.


At least my cat hasn't tried to jump onto the sewing table yet.


Wednesday, 20 May 2015

A Rest, A Change, And Back At It

I just checked my last post date - it's been awhile. In that time I've been busily sewing hostess gifts for a big trip I took and I've been working on my sister's wedding quilt. She gets married June 5th and as of right now, I'm on track to be finished.

First up are the hostess gifts. For my cousin - 8 cushion covers. These are screen captures from my Instagram - I think the original photos got "lost" when I switched phones. My cousin loved the cushion covers. They are zipper closed on the back and each has a small design on the back that echoes what is on the front.


Then I sewed a whole cloth wall hanging for my Dad's cousin. I copied the Welsh style quilts. I'm really happy with how this turned out. It's my first whole cloth quilt and I learned a few things.


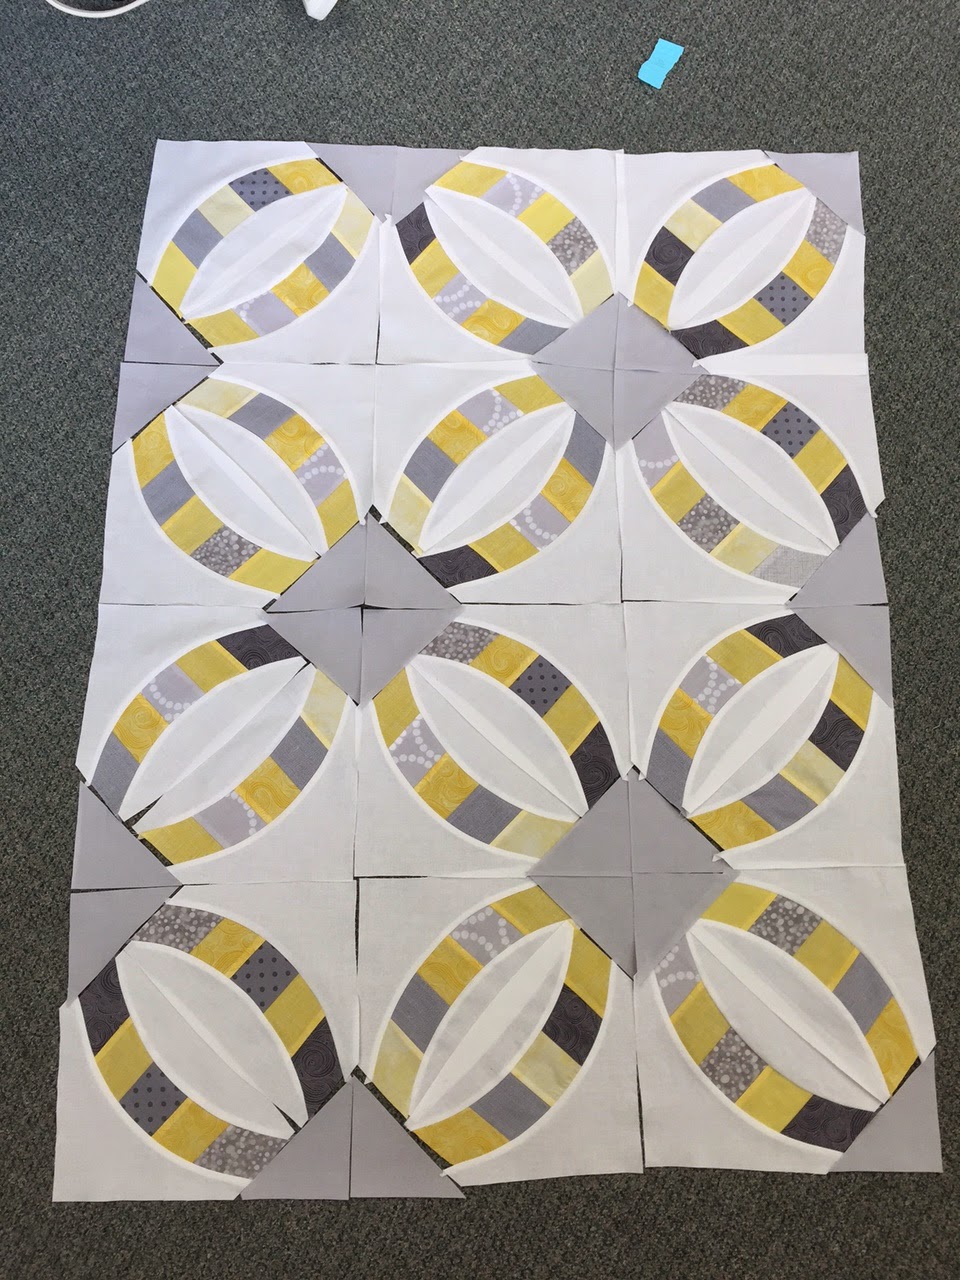
Next I started my sister's quilt. She wants it to be turned into a duvet cover, so it had to be an exact size - not one of my strong points. It's the "Metro Hoops" quilt from Sew Kind of Wonderful - a great pattern to use. It went together pretty quickly - some process shots:
First layout with a few blocks finished

More blocks finished

All the rings cut

adding the grey squares

All the blocks finished and trimmed - all 68 of them
Then I put the top together - minus borders


I'm really happy with how it turned out. The borders have created a problem - that's a post for another day.