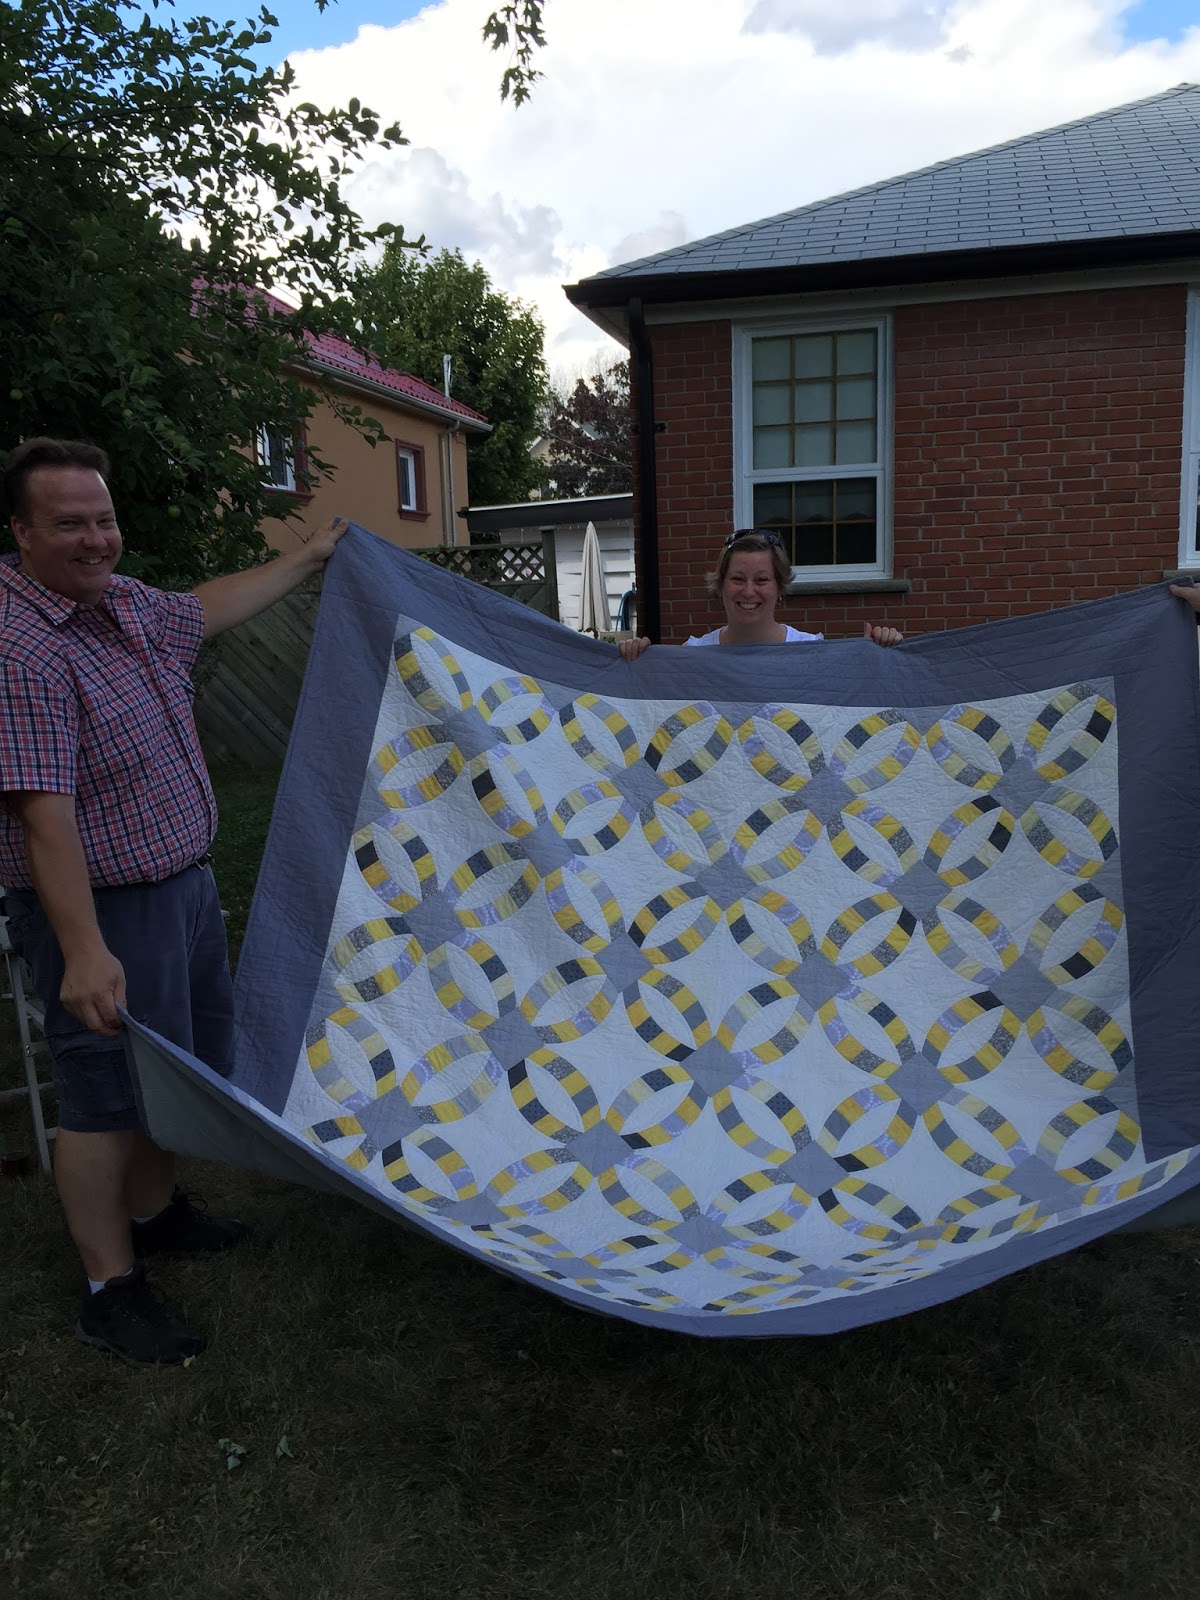
A photo post:
Showing posts with label metro rings. Show all posts
Wednesday, 12 August 2015
Sunday, 14 June 2015
Another template to the rescue
I was debating whether or not to quilt the melons in this quilt - most people I asked said yes - that's what I really thought too but there are 64 of them.
I tried a bunch of different ideas and finally settled on something simple that filled the space, was easy to mark, and echoed the other designs. A lot of people online used a lot of pebbles in this quilt and that's just not in my repertoire with my current machine.
I made myself another template and got to work. These went together really quickly and I have no issues quilting the melons.
My template (the straight lines align with the seam line down the middle)
My dots:
Finished:
The templates I made and used for this quilt have been simple but very effective and I'm really happy with how they turned out.
I tried a bunch of different ideas and finally settled on something simple that filled the space, was easy to mark, and echoed the other designs. A lot of people online used a lot of pebbles in this quilt and that's just not in my repertoire with my current machine.
I made myself another template and got to work. These went together really quickly and I have no issues quilting the melons.
My template (the straight lines align with the seam line down the middle)
My dots:
Finished:
The templates I made and used for this quilt have been simple but very effective and I'm really happy with how they turned out.
Heading for the Border
I've finished the quilting (I think, still have to check the back) of my sister's wedding quilt. The wedding was June 5th so I'm a little late.
The borders are one. The quilt was pretty square before I put the borders on and they are laying flat (on top); the underside is a slightly different story, but it's going to be hidden inside the duvet cover. There were some border issues earlier - I'm much happier now.
I'm just doing straight lines in the borders, using painter's tape to mark with. The quilt is now so heavy and awkward I'm not as interested in finishing, but finish I must!
The quilt is so big now and I'm not tall enough to get it all in the picture
1.5" wide painters tape marking the borders.
What are you up to?
The borders are one. The quilt was pretty square before I put the borders on and they are laying flat (on top); the underside is a slightly different story, but it's going to be hidden inside the duvet cover. There were some border issues earlier - I'm much happier now.
I'm just doing straight lines in the borders, using painter's tape to mark with. The quilt is now so heavy and awkward I'm not as interested in finishing, but finish I must!
The quilt is so big now and I'm not tall enough to get it all in the picture
1.5" wide painters tape marking the borders.
What are you up to?
Monday, 1 June 2015
Quilting Update
My sister's quilt is coming along pretty well.
I'm either going to be just finished or just not finished by the time I have to leave for the wedding. No big deal if it isn't finished (But I'd like it to be so I can have the space back in my sewing room and make something for myself next).
Tuesday, 26 May 2015
Improving My Quilting
I've been on sabbatical since Feb 1 and have been sewing a lot - but not doing too much quilting.
Until now.
I've been working on a wedding quilt for my sister and it is a beast of a thing in terms of size and weight and I was struggling a bit with the quilting. Then I saw that Craftsy had a big sale on this past weekend so I picked up two of Angela Walters classes: Dot to Dot quilting and How Do I Quilt This?
I started with the Dot to Dot class because it was pretty short and I realized I don't want to be doing too much marking on this quilt.
Today I finished the stitch in the ditch on the quilt and started with the free motion designs. I followed some of Angela's ideas and incorporated a few of my own.
I decided on a simple design and made myself a template to help with the dot placement. I do like things even and well spaced.
My squares are about 4 1/2" wide so I started with a square that big and I marked off the diagonal lines:
The little ticky marks are about half way between the centre and the corner and 1/2" out from the centre line.
Then I cut it out and notched the ends and ticky marks. The ends I notched out to help with placement and centering. It worked great.
This is the first square I marked. See the 8 little blue dots? My other "dots" for quilting are the corners and the centre - I didn't mark those.
Then I did my first shape. It looks pretty good to me. I used a water soluble marking pen so a quick spritz with water and I was moving on.
On my next one I realized it was hard to hit the "dots" that weren't marked because they were a little hard to see (since they didn't really exist). So I added a few more marks - actual dots in all the places I need. I'm so happy with the results and I'm sewing right along.
Now, if my cat would only stay off the quilt while I'm quilting, I wouldn't have to drag her weight around with the quilt.
Until now.
I've been working on a wedding quilt for my sister and it is a beast of a thing in terms of size and weight and I was struggling a bit with the quilting. Then I saw that Craftsy had a big sale on this past weekend so I picked up two of Angela Walters classes: Dot to Dot quilting and How Do I Quilt This?
I started with the Dot to Dot class because it was pretty short and I realized I don't want to be doing too much marking on this quilt.
Today I finished the stitch in the ditch on the quilt and started with the free motion designs. I followed some of Angela's ideas and incorporated a few of my own.
I decided on a simple design and made myself a template to help with the dot placement. I do like things even and well spaced.
My squares are about 4 1/2" wide so I started with a square that big and I marked off the diagonal lines:
![]() |
| sorry for the bad lighting - I had the drapes pulled to try to keep it cool in the house - we're in a bit of a heat wave right now |
Then I cut it out and notched the ends and ticky marks. The ends I notched out to help with placement and centering. It worked great.
This is the first square I marked. See the 8 little blue dots? My other "dots" for quilting are the corners and the centre - I didn't mark those.
Then I did my first shape. It looks pretty good to me. I used a water soluble marking pen so a quick spritz with water and I was moving on.
On my next one I realized it was hard to hit the "dots" that weren't marked because they were a little hard to see (since they didn't really exist). So I added a few more marks - actual dots in all the places I need. I'm so happy with the results and I'm sewing right along.
Now, if my cat would only stay off the quilt while I'm quilting, I wouldn't have to drag her weight around with the quilt.
Thursday, 21 May 2015
The Problem With Borders
On my last post I showed you the progress on my Metro Rings quilt. Everything went great until I put on the borders - it was great then too, until I tried to baste it for quilting.
See those ripples in the border - not good! Not supposed to be there! I don't know what happened - I measured the quilt and the borders and sewed them on - everything I was supposed to do to get flat borders. (And if you think you know what the problem might be, please let me know. I sewed the borders on with a 1/4 foot instead of a walking foot - but that shouldn't have made it this bad. I'm wondering if I measured incorrectly somewhere.)
I was not happy. And I was pin basting it in a church, when the senior group was meeting, so no foul language allowed. I texted my quilty friends right away - they were consoling, offered some suggestions, and wished me luck. I googled to see what others suggested - to no great help though.
I emailed the quilting guru who thinks it's weird and I asked another expert. The consensus is to remove the borders, quilt the middle part, then put the borders back on. So, that's what I'm doing. And hoping for the best.
I only removed 3 borders for now. I pin basted the quilt - a first for me (and it went pretty well) and I sprayed one border to see if I could coax it to lay flat. No such luck. So I left the sprayed border on to avoid dealing with the stickiness of the spray. I'll take it off later.
I started quilting tonight. This quilt is a beast. The finished size will be 86" x 86" and right now it's about 96" x 96". My sewing machine isn't that big. It's a bit of a struggle to maneuver this thing under my needle - and I started in the middle to keep the wrinkles to a minimum.
At least my cat hasn't tried to jump onto the sewing table yet.
See those ripples in the border - not good! Not supposed to be there! I don't know what happened - I measured the quilt and the borders and sewed them on - everything I was supposed to do to get flat borders. (And if you think you know what the problem might be, please let me know. I sewed the borders on with a 1/4 foot instead of a walking foot - but that shouldn't have made it this bad. I'm wondering if I measured incorrectly somewhere.)
I was not happy. And I was pin basting it in a church, when the senior group was meeting, so no foul language allowed. I texted my quilty friends right away - they were consoling, offered some suggestions, and wished me luck. I googled to see what others suggested - to no great help though.
I emailed the quilting guru who thinks it's weird and I asked another expert. The consensus is to remove the borders, quilt the middle part, then put the borders back on. So, that's what I'm doing. And hoping for the best.
I only removed 3 borders for now. I pin basted the quilt - a first for me (and it went pretty well) and I sprayed one border to see if I could coax it to lay flat. No such luck. So I left the sprayed border on to avoid dealing with the stickiness of the spray. I'll take it off later.
I started quilting tonight. This quilt is a beast. The finished size will be 86" x 86" and right now it's about 96" x 96". My sewing machine isn't that big. It's a bit of a struggle to maneuver this thing under my needle - and I started in the middle to keep the wrinkles to a minimum.
At least my cat hasn't tried to jump onto the sewing table yet.
Subscribe to:
Posts (Atom)