Showing posts with label tips. Show all posts

Tuesday, 2 June 2015

Remember to Blink

I took a quick break from my sister's wedding quilt (here, here, and here) this weekend to whip up a quilt for a baby shower. The parents-to-be are the brother and sister in law of my sister in law. I see them a lot at family gatherings and this is their first child - a cousin for my nieces.

I made them this quilt

Which is a pattern I borrowed from Buttons Quilts and it was super easy.
I quilted all straight lines, with the walking foot, doing stitch in the ditch down and across the sashing, then horizontal and vertical to match all the small squares - I ended up with a big grid of about 4" squares, interspersed with some 2" lines/squares. It looked good. If you look hard you can see the lines in the orange square.


I marked the lines using my hera marker - it just makes an imprint line in the fabric which I don't have to remove later - a total bonus given my tight timelines these days. It was pretty easy to see - it was an overcast day and that might have helped.

When I was quilting along the sashing, like here
and here
I had to keep reminding myself to blink - blinking helped keep me accurate I think. The pattern on the fabric is busy and almost mesmerizing too.

The label:

My nieces coloured the fronts of these cushions on our last crafternoon so that they would have something to give their new cousin. The backs of the pillows matches the back of the quilt.


The soon-to-be mommy loved them.


Tuesday, 23 October 2012

TTT - Twirling Seams

I've had a busy week and weekend and didn't think I'd have anything to post this week (much like last week). Then I decided I'd sew a little tonight to finish my Dear Jane homework and realized I could TTT about twirling seams. Here goes...

Twirling seams flattens out some of your seams and so reduces bulk in a four square patch. Here's what I did on a Dear Jane triangle block.

1. Press your seams all toward the dark - in this case, the green.

right side of fabric (please excuse the bad lighting)

wrong side of fabric with seams pressed towards the dark (green)
2. Then, sew another piece to the first one. If you always press the fabric the same way (in this case, towards the dark), then your seams will nest together nicely and you get better points.

3. You need to pick out the 2-3 stitches on your vertical seam that are in the seam allowance of your horizontal seam (blue arrow). The pink arrow is the vertical seam. You will pick out stitches directly above (north) of the intersection of the arrows. Pick them out on both sides of the fabric.


4. This is where I used to get messed up. Open up your fabric. The seams will fall open in the way they will want to lay (sometimes you have to help them a little).

Starting to fall open

I helped them fall open

You can fingernail press along the seam to help
If you look where they fall open, they  make a sort of square out of the two colours of the fabric - in a checkerboard pattern.

5. Press. I press this seam from both sides because I think it lays flatter.
Here's my finished Dear Jane triangle
back side of the triangle

back side of another twirled seam square
When I first learned this technique it took me a while to figure it out. Practice on some scraps. Once you get it, you'll love it!

Tuesday, 9 October 2012

TTT - Padded Hangers

I have a little extra padding - I wish it was as easy to move around as this hanger padding.

I think I got this idea from pinterest - maybe not - I do know it's not an original idea. I love it though!


1. Go to your local home supply store - I went to Home Depot.

2. Find the foam insulation in tubes that goes around pipes. It's probably in the plumbing section. It's the insulation you put around the pipes of your hot water heater. It's dirt cheap - maybe $2 a piece.

3. Buy some.

4. Cut with scissors to the length of your hanger. This insulation has a sticky piece to close the tube - I left the plastic on there so it didn't get "sticky goop" all over my fabric.

These are great if you have heavy projects to hang or ones that will hand a long time. You don't get a bad crease in them from regular hangers.

Happy Quilting!

Tuesday, 2 October 2012

TTT - Bendy Bright Light

Some weeks I think if it weren't for this weekly post I wouldn't get anywhere near my blog - and therefore, no where near the sewing machine.

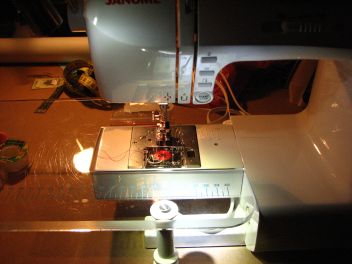
I got this handy-dandy little light probably 4 or 5 years ago. I love it! Just after I got it, when I went to quilt classes, people would ask about it. I happily told them how much of a difference it made to my sewing. Finally, I could see much better than before.


So many of us sew in spaces that don't have great lighting. I'd love a second floor sewing room with tons of natural light - I should dream on, unless I win the lottery or marry a lot of money! Having great light is important so that we can see what we're doing, and sew into the wee hours of the night, if necessary.

This light attaches with sticky stuff to the side or top of your machine. You can remove the light - you press on the level that's at about 1:00 (in the above photo) and you can slip out the light and cord. I only do this when I take my machine in for servicing. The sticky stuff hasn't come unstuck in all the years I've had the machine. I've also seen replacement brackets - I'd get that if I was switching the light between machines.

The light is LED and should last thousands of hours. I think I paid around $40-$50 for the light - I do know I got it on sale, so I think around $50 is the going rate. It's totally worth it in my opinion.

light on

light off
The arm adjusts so that you can place the light wherever you want.

Happy sewing!


Tuesday, 25 September 2012

TTT - Starch

Back again - the week goes around pretty quickly around here. The new blogger interface finally appeared on my blog - I've been avoiding installing it until I was forced to. I'm sure I'll figure it out.

Today I want to talk about starch. I really like starch. It's changed my quilting life.

I pre-wash everything, probably because I started sewing clothing and there you have to pre-wash/pre-treat all your fabric. I also worry that colours will run - which has happened to me - thankfully in the pre-wash stage. I also like the fact that if there is going to be shrinkage in any way it happens before all the sewing work.

Anyway, when you/I pre-wash I take the sizing out of the fabric - that's the stuff the  manufacturer adds to fabric to make it sort of stiff and have body. I add some back in with starch because I prefer to sew with a little body in the fabric. After I've pre-washed and dried (in the dryer) I iron/press my fabric. If I'm using the fabric right away, I give it a light starch when pressing; if the fabric is going in the stash, I don't starch it until I use it.

Another great thing about starch is it helps relax the fabric a bit so you can get the wrinkles out. My Dear Jane blocks lay really flat partly because I starch them when I'm finished (and all the fabric has a light starching before sewing).

Mostly I use this starch which I get at my local grocery store (Loblaw's)

It was recommended to me by my local quilt shop owner when I made a lone star quilt for my cousin
which had a lot of bias edges and the starch would help to reduce stretching.

I like that's it's not too heavy, is very reasonably priced (under $4 a can), and is easy to find. It also flakes minimally.  I think this company makes a heavier starch in a purple can but I've never tried it.

Some people say moths are attracted to starch - I don't know. I have never had a moth problem.

In the spring I bought some of this at a quilt show
because it was on sale there. I got mixed reviews on it from other quilters but thought I'd try it. It has it's place in quilting - and since the bottle is nearly empty I've clearly used it - but I don't use it very often. I like that it's really light - almost too light for my taste. It's also pretty expensive at around $12 a bottle. It flakes now and then. The smell is kinda iffy - it's scented which bothers some people. It is a non-aerosol can.

I did some applique on my Dear Jane quilt and used the blue starch - it worked excellently for that type of job.

I think the most important thing to remember about starch is to not over do it.


Tuesday, 18 September 2012

TTT - Squaring up your fabric before cutting

I kinda feel like I've planned out these TTT backwards - oh, well. If somebody learns something, that's awesome.

Today I'm going to talk about squaring up your fabric before you start cutting. If your fabric is squared on the grain of the fabric, your quilt will lay flatter and you'll have fewer distortions.

Notes of caution: I always pre-wash my fabric before cutting or sewing (unless I use pre-cuts like jelly rolls or charm packs; which I've yet to use anyway) to avoid accidents like colour bleed or shrinking. I always buy a little more fabric than I need to allow for squaring up - I have seen cheap fabric go off grain by up to 10cm. With printed fabric, especially something with stripes or plaids, you sometimes lose your stripe or plaid if you square your fabric to the grain - then it's your choice about whether to square the fabric or cut to the printed pattern. I seldom buy stripes or plaids for that reason, but if I do have them, I use them sparingly and not in the borders unless I'm sure they're on straight of grain (I had this problem with some of my Dear Jane fabrics and for them I cut to the printed pattern to maintain the plaids as much as possible). If you rip your fabric to get a straight edge - it doesn't always leave you on the straight of grain so be careful. I ripped the red to get a manageable size and it's off - as you see in the photos. The white I'm using I also ripped and it's not off grain as much as the red. I find the cheaper the fabric, the more it rips crookedly.

Step 1: Wash and press your fabric if that's your plan. Then, match up the selvages (the finished ends, not the ones you cut) of your fabric. I hold my hands about 1/2 yard apart and grip the fabric like this:

Thumb towards me, then the front layer of fabric, then pointy finger, then back layer of fabric, then middle finger.
You match up the edges of the fabric, not the corners.

2. Wiggle and manoeuvre your fingers until your fabric hangs straight down with no ridges or bumps:


This one is good, no ridges or bumps running on the diagonal and the folded edge on the bottom is even.


This one is not good - see the ridge running diagonally on top of the arrow. The folded bottom edge is not quite straight on the left side - extend the arrow to the edge and you'll see it - it's subtle in this photo.

This one is even worse - see the ridge above the arrow? See how the folded edge is uneven on the left side?
Thanks Mom for holding the fabric.

3. Once you get rid of your ridges, carefully lay your fabric on your cutting surface.
4. Now you need to trim the fabric to get a straight line. Use a long ruler and lay it straightly and evenly along the FOLDED edge of your fabric. I will cut on the right side of the ruler - I need the 6" of ruler to lay along the fold to help me be straight.


5. Move the ruler left or right until you can get a straight line through all your layers.

At the selvage edge I'm off by close to an inch. The ruler is along the edge of the top layer of fabric to help you see.

This is how much I'm off at the folded edge - not too much
6. Cut - with some pressure (but not too much) and a sharp blade. Press evenly all the way along and put pressure on the ruler so it doesn't shift.

The fold is towards me (at the bottom) and I'll cut along the right hand side of the ruler.
7. When I cut the rest, I turn the fabric around so that the fold is away from me (at the top) and line up the ruler so that I'll cut along the right edge. The fabric covered by the ruler is my 1 3/4" strip that I need. I'm right handed - if you're left handed, you should still align your fabric so that the measured part you are cutting is under the ruler.


These are all the photos I took so this must be the end of the tutorial. This tutorial also talks about cutting accurately.

Happy sewing!

Tuesday, 11 September 2012

TTT - Your seam ripper

source: http://www.emblibrary.com/el/products.aspx?Catalog=Emblibrary&ProductID=d7490

Unless you're perfect, you need to rip out seams now and then. Here's a helpful way that will reduce your time a little.

From the BOBBIN side of your seam, rip out your stitches every 3-8, depending on how dense your stitches are. I usually go about every 5 stitches.
first ripped stitch, heading to the right to finish

Once you're ripped out your stitches, your seam will look like this:
about every 3-4 stitches ripped; this seam is denser


Turn over your fabric, so the NEEDLE side of your seam is facing up.
see the loop to the right of the seam ripper?


Starting at an edge, gently pull on a stitch. You should get a big loop. Pull on the loop gently and you should be able to pull a long thread. If you pull on the loop too much with the seam ripper, you'll rip the thread - pull with your fingers once you get it started.

You should end up with a long thread like this:


Clip your long thread and brush off/pick off your short threads and you're done. If your seam is really long, you might have to clip your long thread a few times to help it along. My seam here was only 1.5" long to rip out so my long thread came apart in one length.

What I like about ripping out seams this way is that it's less tedious than ripping every stitch and you don't distort your fabric by pulling it apart. If the sewing is really dense, it's never easy to pull out the stitches - take your time and you'll get better results.

Tuesday, 4 September 2012

TTT - scant 1/4" seams

So far we've gone over cutting and pinning. We need to talk about 1/4" seams. It has taken me a lot of years to master the scant 1/4" seam, so I'm passing on my knowledge to you - and hopefully it doesn't take you as long as it took me.

What is a scant 1/4" seam?

A scant 1/4" seam is very slightly smaller than a full 1/4" seam - about a thread width smaller. In quilting, and any sewing, accuracy is important so that your seams match up, you maintain your points, and your finished product is the size it's supposed to be. If your seams are out even 1/16", then every time you add a seam, you're out another 1/16" - at 4 seams you're out 1/4"; over an entire quilt that can really add up. The reason you need a scant 1/4" seam is that when you press your seams to one side, thread takes up space - it's only a little space - but it can add up.


In the photos below, the seam on the left is a scant 1/4" - green arrow. It's hard to see, but look closely. The seam is just to the inside/right of the 1/2" mark on the ruler (which represents a 1/4" seam from my yellow orientation line. The centre line is my orientation line - yellow arrow. The right seam is just to the right/outside of the 1/4" mark - black arrow - this is a full 1/4" seam ( I think of it as a generous 1/4").


ruler oriented a different way
 
Test yourself. Sew/draw a registration line on a piece of fabric or paper. Sew a 1/4" seam along that line. Are you scant or full?
 

A test for scant 1/4" seams

Take two scrap pieces of fabric that are exactly the same width. Mine are 1 3/4" cause that's what's laying around. Sew a 1/4" seam - start with how you usually sew a 1/4" seam. Press open your seam like you would when quilting. Lay your ruler down on your fabric; your width should  be exactly double your original width minus 1/2". In my case, 1 3/4" + 1 3/4" = 3.5" minus 1/2" = 3".
 
I checked my seam before pressing open. If I line my seam up on my 1/4" mark on the ruler, my fabric falls just short of the edge of the ruler - about a thread width.

a 3" piece - my seams are a scant 1/4"
If your piece is not exactly the right size you need to adjust the width of your 1/4" seam.

How to get a scant 1/4" seam

I have two 1/4" feet. I like the metal one with the black guide the best. It's the one that came with my machine:
my favourite one


I don't use this one too much
 
If I just use my quarter inch foot and line the fabric up along the black guide, my 1/4" seams are too generous. To compensate, I move my needle position to the right of centre. On my machine it looks like this (I have a Janome 4100). Centre is at 3.5 and I move the needle to 4.3. Make sure your needle will still go through the hole in your needle plate - I need a zig-zag needle plate to do this.
 
 
If you can't move the needle, here is another suggestion.
You likely have a 1/4" mark on your needle plate. On my maching it's on the bobbin cover:
 
the arrow shows the 1/4" mark
 
If I sew following this mark, my fabric does not go all the way to the edge of the guide on the presser foot but I get a scant 1/4" seam. I feel like I'm not as accurate unless my fabric touches the guide on the machine; this method won't work for me for tiny pieces, such as in my Dear Jane quilt, because the registration mark is far away from the needle.
 
When I'm sewing a scant 1/4" seam, it looks like this:


I've move my needle to slightly right of centre, my fabric lines up with the guide on my foot, and I'm not on the 1/4" mark on my needle plate BUT I get a scant 1/4" seam.


What do I do now?

Now, you have to practice and play. Every machine is different so try the tests and fiddle around until you get a seam allowance that is a scant 1/4". Try the ruler test and sew two pieces of fabric together. Try a 1/4" foot if you don't have one. Your accuracy will improve and your quilts will look better.


Tuesday, 28 August 2012

TTT - Cutting Accurately

 
I feel like I should have some epic theme music to start this off but I'm useless with song titles so please insert some epic music from your own head.

Today I want to talk a bit about cutting accurately. If you want your quilts, and any other sewing projects for that matter, to finish to the correct size, you need to cut and sew accurately. I'm not cutting anything right now - I'll post more actual cutting photos when I'm back to the Hunter's Star.

My cutting mat:


This is a self healing mat I've had forever. It's taken a lot of abuse and will take a lot more. I recommend a self-healing one at least this size - 18x24 - if you have a large space for cutting where the mat can stay out all the time, I'd get a larger mat. This one works for almost everything I do. I need to be careful when cutting WOF to make sure I don't cut the table on either end - that's the instance where I'd like a slightly larger mat.

My rotary cutter:


This is my trusty Olfa rotary cutter - size 28mm. I like this one better than the larger sized ones because I think this one gives me better control. (I can also get the blades fairly cheap and I'm thrifty). Make sure you change your blade fairly often. I judge by when I'm not getting a clean cut anymore - then it's time to change the blade. I have to admit that I use the blades as long as I possibly can though.

My rulers:
6x24

12.5x12.5

6.5x6.5

4x14
These are just the regular Omnigrid rulers. I don't have the "no slip" ones and haven't tried them. If I were going to buy new rulers I'd investigate them to see how well they worked.
The biggest thing to remember about rulers, in my opinion, is use the one you need for the job - for small pieces, use a small ruler; for big pieces, use a big ruler.

To cut WOF I use the 6x24 and I always use the Gypsy Gripper with this ruler.

I rarely use the 12.5x12.5, mostly because I don't square my blocks as I go (and I think I'll start that soon). This ruler is useful to square up larger squares.

The 6.5x6.5 ruler I bought to use when making my Dear Jane quilt. Those blocks are small and the pieces small and I find this ruler very helpful. I also have a special Dear Jane template ruler for the 5" blocks and the triangle pieces.

The 4x14 ruler I don't use often either; usually only when I have strips that fit within that size. I don't use the gripper with this ruler - I find it's small enough that I can hold it steady.

Gypsy Gripper:


I picked up this handy little tool quite a few years ago. It sticks to your rulers by suction and helps you keep hold of larger rulers. It's always attached to the 6x24 ruler. What I like about it is that is helps me hold the ruler still while cutting and apply even pressure. And my hand isn't too close to the blade so I don't worry about cutting myself. Sometimes it loses suction and I have to re-attach it, which takes about 3 seconds so really there is nothing to complain about. You can buy these in smaller sizes for smaller rulers - I don't think I'd bother with that.

How to Cut:
If possible, you should have your cutting table at an adjustable height so that you don't get aches and pains in your back, legs, or arms. I like to lean heavily on my mat/fabric/ruler to prevent slipping so I like my table a little lower than I've seen recommended. Right now I'm using the dining room table and it's a great height for me. I have seen people add pieces of plastic tubing to their table legs to increase the height and it's more stable than you'd think.

You MUST keep your rotary cutter perpendicular to your ruler in order to get accurate cuts:

Keeping your ruler at this 90 degree angle will help you be more accurate.

Don't do this:


Your pieces will be too small and your quilt too small.

Or this:


Your pieces will be too big.

I lean on the ruler/fabric/mat to prevent shifting, then run the ruler along the edge, with enough pressure to cut through my layers (but not through the mat and table). You'll develop a feel the more you cut. I also cut at a fairly quick pace - too slow and things shift, but too fast and you can be inaccurate. Practice will help you find your best pace that gives you accuracy.

When I actually cut more pieces for the Hunter's Star, I'll show more actual cutting photos.
Next week I'll talk about 1/4" seam allowances.